Overview
As a fact nearly all businesses have websites (as well as government agencies and individuals) a large enthusiasm exists for setting up facilities on the Web for electronic commerce. There are major security issues involved here that need to be addressed. Nobody wants to send their credit card number over the Internet unless they have a guarantee that only the intended recipient will receive it. As businesses begin to see the threats of the Internet to electronic commerce, the demand for secure web pages grows.
A number of approaches to providing Web security are possible. The various approaches are similar in many ways but may differ with respect to their scope of applicability and relative location within the TCP/IP protocol stack. For example, we can have security at the IP level making it transparent to end-users and applications. However, another relatively general-purpose solution is to implement security just above TCP. The foremost example of this approach is the Secure Sockets Layer (SSL) and the follow-on Internet standard known as Transport Layer Security (TLS).
The Secure Socket Layer (SSL)
SSL provide security to the data that is transferred between web browser and server. SSL encrypt the link between a
web server and a browser which ensures that all data passed between them remain private and free from attack.
SSL provides privacy and data integrity between two communicating applications. It is designed to encapsulate other protocols, such as HTTP. TLS v1.0 was released in 1999, providing slight modifications to SSL 3.0.
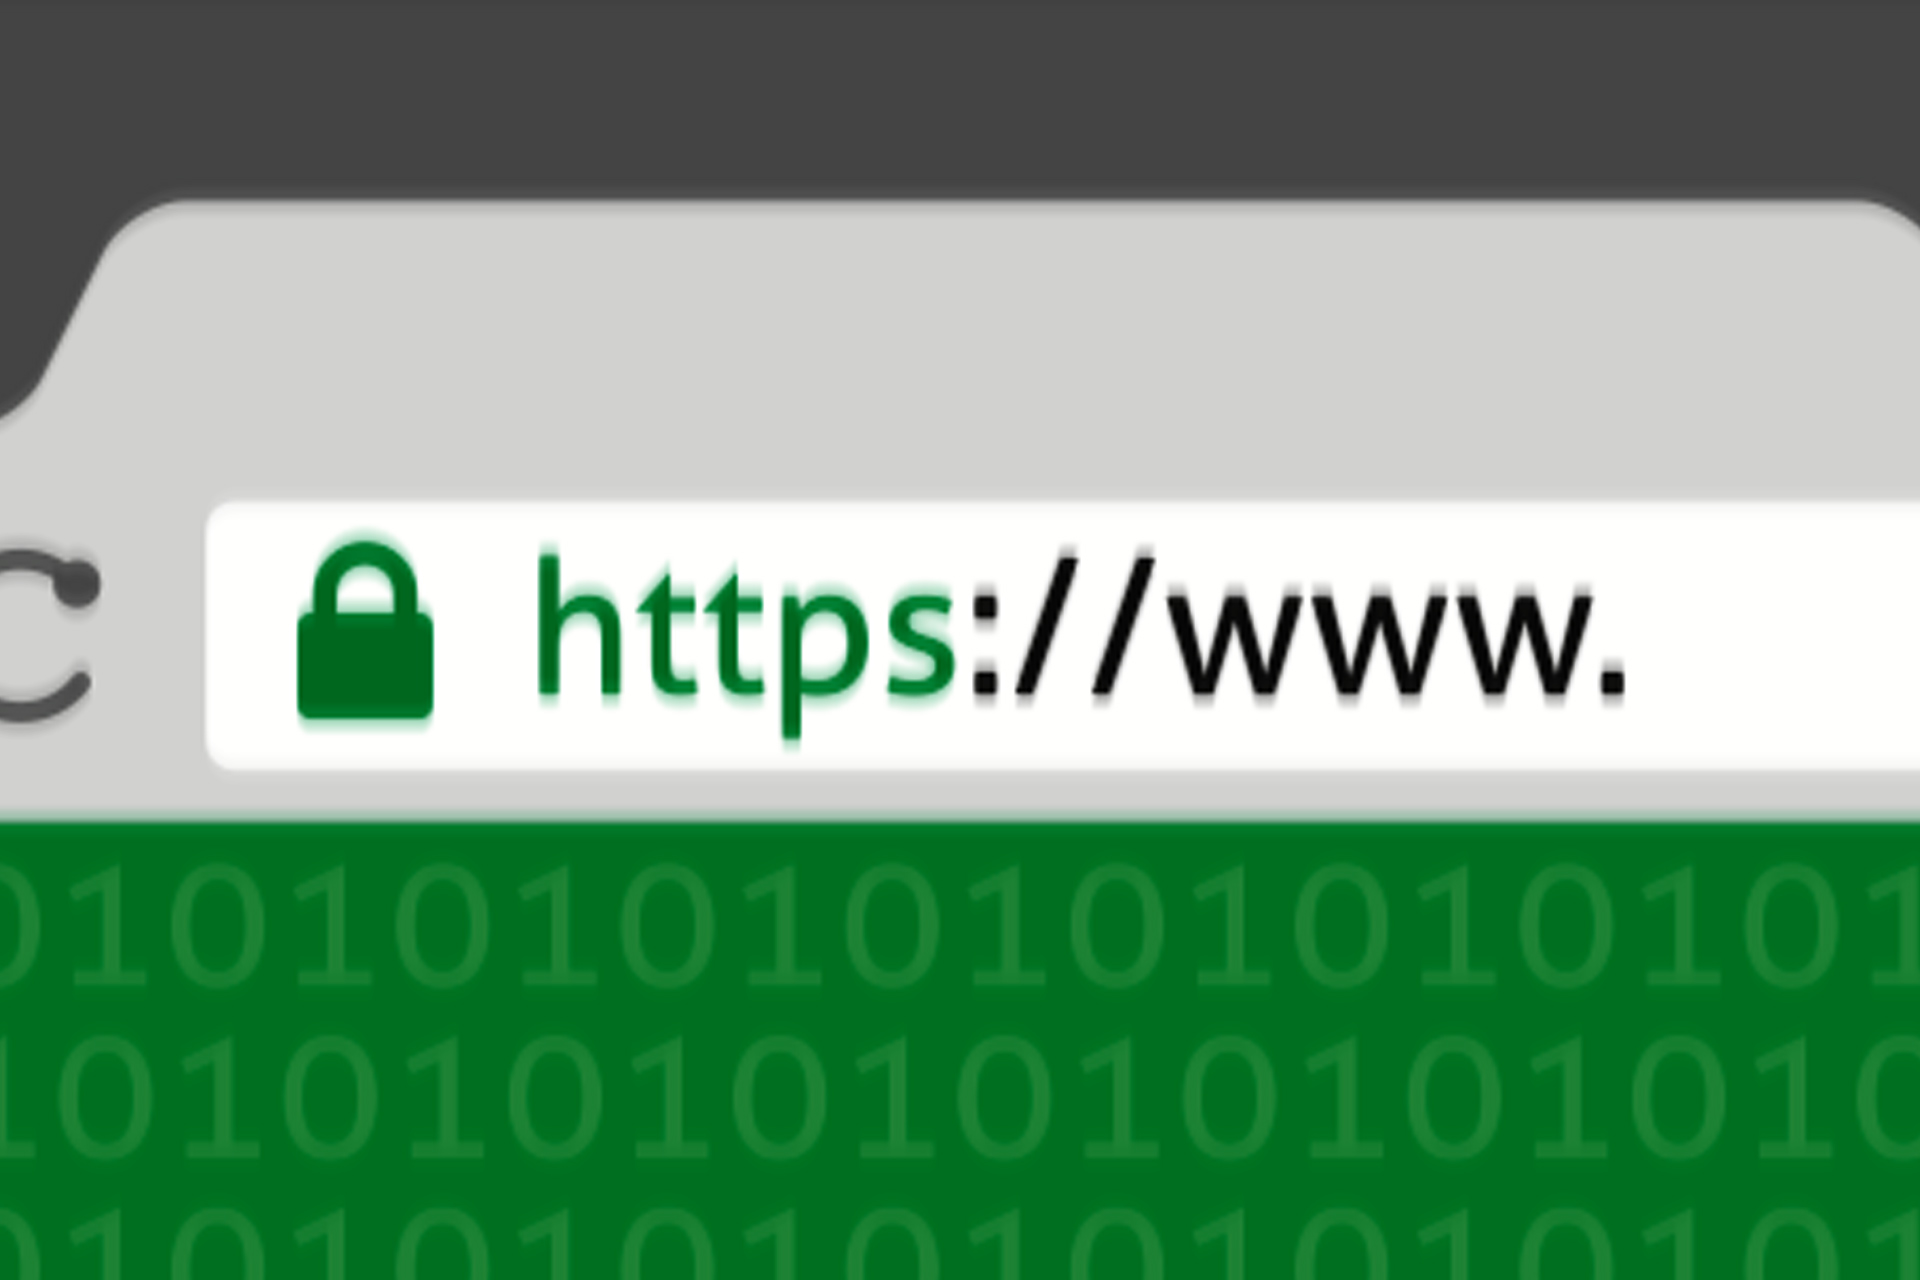
A website that implements SSL/TLS has “HTTPS” in its URL instead of “HTTP.”
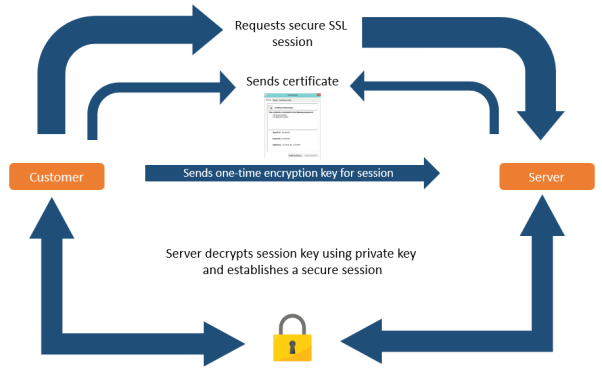
How is an SSL encrypted connection established?
Step 1: A user requests a secure connection to a website. This is done by entering a URL that begins with ‘HTTPS’ into an internet browser. For example, https://www.example.com
Step 2: The website responds to the user’s request and sends its SSL certificate to the browser for authentication. This is known as the ‘SSL handshake’.
Step 3: The user’s browser verifies the SSL certificate is valid. The browser displays a padlock icon in the URL, indicating the website is secure and can be communicated with.
Step 4: After successful verification, a secure connection is established between the browser and the website. Further communication between the browser and the site is encrypted. Information passed between the two parties can only be deciphered by the two parties involved. Hackers will not be able to decode any information passed between the two entities.
How can I tell if a site is using SSL?
Internet browsers, like Chrome, Firefox, and Internet Explorer, indicate whether a website is using SSL by offering several visual cues:
- The URL of the site will begin with https://, where ‘s’ stands for secure
- The browser will show a padlock icon in the address bar
- Some SSL certificates will cause the address bar to turn green, indicating the site uses an extended validation certificate (the most secure and trusted certificate available).
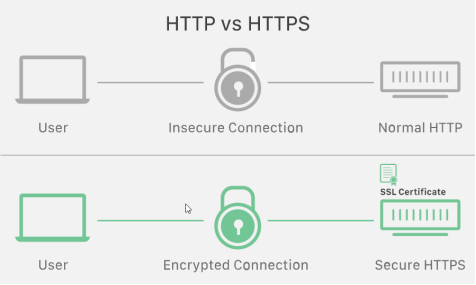
Using SSL

Not Using SSL

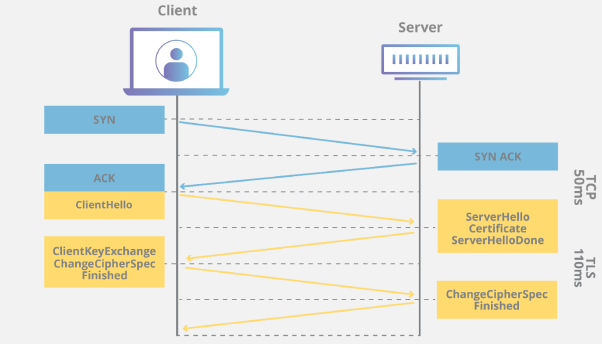
SSL handshake process
Handshake Protocol is used to establish sessions. This protocol allows the client and server to authenticate each other by sending a series of messages to each other. Handshake protocol uses four phases to complete its cycle.
- Phase-1:In Phase-1 both Client and Server send hello-packets to each other. In this IP session, the cipher suite and protocol version are exchanged for security purposes.
- Phase-2:Server send his certificate and Server-key-exchange. The server-end the phase-2 by sending Server-hello-end packet.
- Phase-3:In this phase Client reply to the server by sending his certificate and Client-exchange-key.
- Phase-4:In Phase-4 Change-cipher suite occurred and after this Handshake Protocol ends.
Keys and Certificates
SSL/TLS works by binding the identities of entities such as websites and companies to cryptographic key pairs via digital documents known as X.509 certificates. Each key pair consists of a private key and a public key. The private key is kept secure, and the public key can be widely distributed via a certificate.
The special mathematical relationship between the private and public keys in a pair means that it is possible to use the public key to encrypt a message that can only be decrypted with the private key. Furthermore, the holder of the private key can use it to sign other digital documents (such as web pages), and anyone with the public key can verify this signature.
If the SSL/TLS certificate itself is signed by a publicly trusted certificate authority (CA), such as SSL.com, the certificate will be implicitly trusted by client software such as web browsers and operating systems. Publicly trusted CAs have been approved by major software suppliers to validate identities that will be trusted on their platforms. A public CA’s validation and certificate issuance procedures are subject to regular, rigorous audits to maintain this trusted status.
Obtaining an SSL/TLS Certificate
The basic procedure for requesting a publicly trusted SSL/TLS website certificate is as follows:
- The person or organization requesting the certificate generates a pair of public and private keys, preferably on the server to be protected.
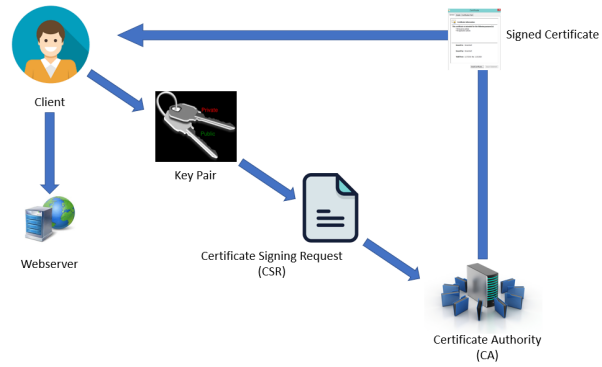
- The public key, along with the domain name(s) to be protected and organizational information about the company requesting the certificate, is used to generate a certificate signing request (CSR).
- The CSR is sent to a publicly trusted CA (such as SSL.com). The CA validates the information in the CSR and generates a signed certificate that can be installed on the requester’s web server.
Other Examples of certificates in day-to-day usage
SSH
SSH is a client and server protocol, and it helps us to access the remote system over the network through the encrypted tunnel. Whenever the client machine accesses the server running SSH, the client downloads the secure key from the server, and at the same time, the server also downloads the key from the client. These two keys make the encrypted tunnel between the server and client, so that data transfer very securely over the network.
SSH vs SSL?
What is the difference between SSH and SSL? When you look at SSH versus SSL, the two shares quite a few similarities — after all, they’re both protocols for creating encrypted tunnels on the internet. But there are also some distinct differences, too:
- SSH and SSL use different ports;
- They have different use cases; and
- They end with different letters.
SSH is generally a tool for technicians, and SSL/TLS is a mechanism for securing websites that is transparent to the user. Of course, these two are not mutually exclusive. SSH may use SSL/TLS as part of its secure solution.
SSH Passwordless Login
If the organization has a large number of servers, every time the admin has to enter the password to access the remote system. It is a pain to enter the password multiple times; SSH comes with a new feature called passwordless login, which helps to access the remote machine without entering the password. The below example explains how to set-up passwordless authentication between client & server and exchange certificates between each other.
Assumptions
Here we have two machines with two different usernames.
| Hostname | IP Address | User | OS | Purpose |
| server.itzgeek.local | 192.168.1.10 | raj | CentOS 7 / RHEL 7 | Source Machine |
| client.itzgeek.local | 192.168.1.20 | ram | CentOS 7 / RHEL 7 | Destination Machine |
Here, I will be using the hostname instead of an IP address.
Follow the steps to create the passwordless login.
Setup SSH Passwordless Login on CentOS 7/ RHEL 7
To enable the passwordless login, we have to put the public key entry of the client machine on the server’s ~/.ssh/authorized_keys (~ represents the user’s home directory) file.
This involves generating an SSH key pair on the source machine and place it on the destination machine with a single command.
Log in to the source machine and create an SSH key pair using the following ssh-keygen command.
![]()
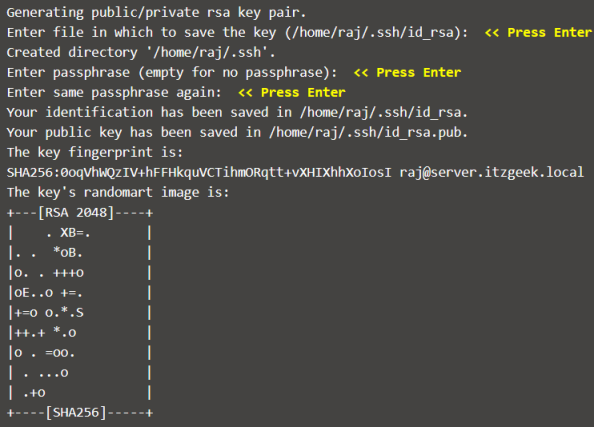
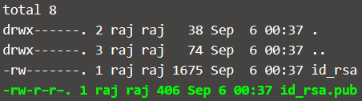
Once you have created, you will find two files id_rsa and id_rsa.pub inside the .ssh directory. We are going to use id_rsa.pub for the passwordless login.
![]()
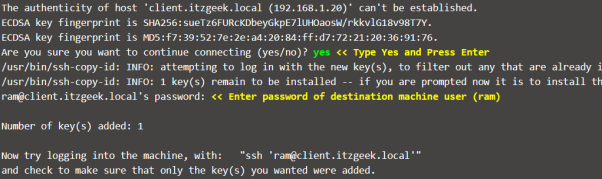
Use the ssh-copy-id command with an input file of id_rsa.pub.
![]()
Note: The ssh-copy-id command creates ~/.ssh/authorized_keys on the destination machine if the file doesn’t. Otherwise, ssh-copy-id would append the new key to existing keys.
Test Passwordless Login
Now access the remote machine using SSH. It will take you to the shell directly without asking for the password.


Author: Harish Sivadasan

Recent Comments